As most of my friends will know, I have a dedicated "Home Theater" Room in my house where I spend most of my holidays, playing games and watching movies for complete enjoyment. But only some of those friends, who actually paid a visit to my HT, know that, I have to use a plethora of remotes to get things up and running. My bro knows that too, (being one of the founding fathers of the HT :P ) and he recently bought the "Logitech : Harmony 880" Universal Remote control, which would be the answer to all our remote woes. I already knew that the thing would have IR Reading feature, but never imagined that the end product would so customizable and good. So lets have a step by step look at the thing.
The Total Package.
The Remote comes packages in a nice box, which contains the remote, a "Base Station" (fancy word for a charger-cum-holder),a Battery(similar to that of cell phones), charger (110-220V), USB cable(normal to Mini), and Installation Disc. Everything was safe and intact even after its bumpy ride to India
The Slender Body and Sleek Interface
The Remote itself is pretty ergonomic, which feels very comfortable to hold. Standard buttons like the number pad, menu, guide, Volume change, channel change are all arranged accessibly on the remote, and then on the top you will find a LCD screen with 8 buttons bordering it (4 on each side). The buttons are positioned in such a way that they merge very well with the body.
The LCD Screen is a Low Res one, It shows you a list of activities that
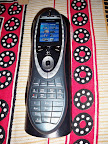 can be selected. When a certain device is selected, it shows the additional buttons from that specific device's remote. You can have pages and pages of buttons for a single device all of which can be arranged in any order,
There is a tilt sensor in the remote using which the remote's backlight lights up when the remote is held in the hand and raised. There is a manual button to explicitly turn the light on or off. The LCD screen is not the only one with a backlight, when the lights turn on, the whole remote is illuminated in a way that you can pin point the smallest of buttons in pitch black darkness.
Easy to Setup and Use
After the initial impressions, the thing that made the most happy was the fact that this thing had a rechargeable battery, the
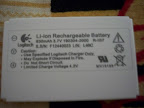 kind that I like. So no more AA or AAA batteries to run around for! and the Fact that surprised me the most was that there was an "Installation Disc" for the thing. Up until now, the Universal Remotes I was familiar with, had a simple paper with list of makes and models which had their codes which when input would lead to the assigning of functions to the remote. But this thing had a complete CD for it. Soon, I connected the remote to my PC via the provided USB cable (with the remote getting charged on the charger) and inserted the installation disc.
Installation of the Software is as simple as it gets, it supports both Windows and
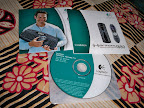 Mac OS. After installation is complete and when you first run the software. If your remote is connected it will not only check for a S/W update but also see if your remote's firmware has an update. After this process is complete, you will be asked to create an ID at the logitech portal. Why an ID you ask? Well, the software works in such a way that all the customizations and settings you have done to your remote will be stored on the Logitech servers, which will allow you to modify your remote using any computer, anywhere you take it! This feature is very useful, as I found for it on the first day itself, when I took the remote to my HT and used the laptop to the changes, at a later stage.
Universalizing the Remote
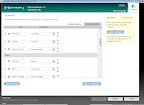
Once you've finished creating the ID. You will be asked to enter the model numbers of the devices that you want to control using the device. After listing out all the model numbers it searches the Logitech database for a matching remote. Incase there is no match found, it will ask you if you have the original remote with you.
In this stage what you do is, hold the two remotes atleast 5Cms apart and press the buttons that are asked on the screen. after a few keys are read. it will analyze the data based on the sample and using some kind of internal formula it will automagically select the closes match.
The surprising thing is that, When I input the signals from the "Weston DVDR" It
In the Rare case when you Remote is so obscure as to not exist in the database in any way, it has the nice step-by-step wizard using which you can enter the basic ways your remote works (1 or 2 buttons for power, TV/AV selection type etc) and then you can manually "Learn" any button from your remote. Which comes in handy in many ways. Let us now take a look at the ways the thing can be customized.
Customization is the Key to success
Most of you with well know models of famous brands may not have to go any further entering the model numbers in the first step. But if you are like me and my bro, who like to survey for months and find the best
 models with a better price, you might have ended up with a collection of devices(from famous brands) which are either discontinued by now (because of features/price being very hard on the company or many other reasons) or were from some obscure company. There is also another trend where same devices have different model numbers in different countries. All these things lead to a bit of problems during the installation of the remote.
Every device in my HT other than TataSky,PS2, and 360 didnt have an exact match in the database. However, they did have approximate matches. Because of this, there were either too many or too few pre assigned buttons for the remotes.
To solve such
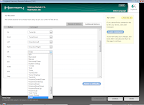 kinds of problems, the Remote's Software allows you to completely customize the buttons and button layout in the remote. Missing buttons from a remote can be manually added to remote's database along with an associating label. Any of these buttons from the database can be assigned to ANY button on the universal remote.
There are only limited buttons in the remote, you have the 0-9 buttons, volume, menu and the other stuff, so what about all those extra buttons that you see in many of the devices? All such buttons can be added and neatly arranged to be displayed in the Remotes LCD screen, all using the software it comes with. You can have many pages (10+) filled with all these buttons for each device. This is a real Plus as it gives you the freedom to experiment with as many combination as possible.
As the software allows the user to assign any button from the database
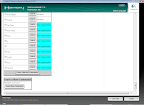 to any of the buttons on the remote control, it gives rise to possibilities where we can assign frequently used functions to any of the non LCD buttons , for faster usage. We can even assign functions to the number buttons, which is helpful as some devices dont have any use of the number buttons.
There might be some cases where the remote is sending singals at a higher rate making the device react differently, like pushing channel one time would result in making it skip channel 3 times. To adjust this, the software allows you to manually set the delay time (in Ms) individually for all the devices that are set in the remote.
Activating Activities
Setting up activities is another nifty feature which allows for one to start a sequence of events with the push of button. The user has the freedom to select any event from any device and arrange them in any order
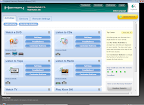 they want. So how will a activity be useful? for example, whenever you watch the TV, you turn on the TV, your Set Top Box, and maybe your A/V Receiver that channels all the sound and video. So what you can do is, assign functions to the Activity which will do just that. You can also select which channel the TV should be on when the activity starts and all such things. everything at the push of button. This is a very useful feature!
Not only that, users can also choose to create or use any of the custom themes for the remote, and you can put up your own custom slideshow to be shown when the remote is idle. You can name Devices and Activities in anyway you want. You can arrange the order in which the devices and activities are shown in the LCD. And it also shows you the time in one corner of the LCD.
All Such customization options allow gives great freedom to the user to make it as personal as possible. Look at me for example, I spent more than 12 hours sitting and modifying and adding things to the remote, just so that everything would be exactly like I wanted.
Ease Of Use
Something this customizable might make people think "its not user friendly" or something on that lines. But the fact of the matter is, Its VERY user friendly.. I mean its a remote, how much simpler can it get? its looks and works just like the age old device that everyone has held for HOURS of their life and the software it comes with has a very simple point and click interface that will get the work done in no time.
Nothings Perfect
As good as it may seem and be, there are still somethings that could have been made better in the remote and its software. For example, the sorting of buttons for LCD screen can get tedious if you are using the "Move up/down" buttons, which makes you want to just delete a button and enter it on the place where you want to move. There are a few other things which could be made better, but mentioning those would seem like I am nitpicking, well because, they arent necessarily a huge problem to the overall experience.
Hows it be?
All in all its a pretty useful device that will make your HT experience far better allowing for more use with less stress and ofcourse.. less Remotes ;)
Check out the SlideShow for a nice Short story and more pics of the Device :D